Step 1
I will upload an image that I would like to add mist and fog effect.

Step 2
I will first add a new layer so I can add the mist effect first.

Step 3
I will use a big white soft brush and paint along the bottom of the image.

Step 4
The mist now looks heavy, to soften the mist down, I will go to layers and lower the opacity to around 50% to give a nice transparent look.

Step 5
I’m done with the mist so now I will add the fog which is a bit thicker. I will get a second picture of clouds and upload the image onto Photoshop.

Step 6
I want the clouds to be black and white. Image>desaturate


Step 7
I need the sky that used to be blue to be really dark. Image>adjustments>levels.

Step 8
Now I have black and white clouds. I can drag the image to the lake then I will change the blend mode of the clouds into ‘screen’ which will make anything black transparent.


Step 9
The fog is hanging up in the air,I want it to be hanging over the lake, so we want to squash the clouds. Hold Ctrl-t to free transform the clouds.

Step 10
At the moment it does not look right as the fog is too sharp, whereas in reality fog is much softer and fluffy. Filter>blur>Gaussian blur. I willincrease the blur to make the fog look fluffy and softens the hard edges.


Step 11
At the moment I still have hard edges, so I will use the rubber tool to rub out the edges by using a soft rubber.

Step 12
Step 13 (Optional)

Step 14
I can flip the duplicated fog upside-down. Image>transform>flip horizontal, this will avoid repeating pattern.

Step 15
I can give that duplicated fog a little twist by turning it sideward’s. I will also tweak the opacity of the two fogs to get the effect to look exactly I want it to be.

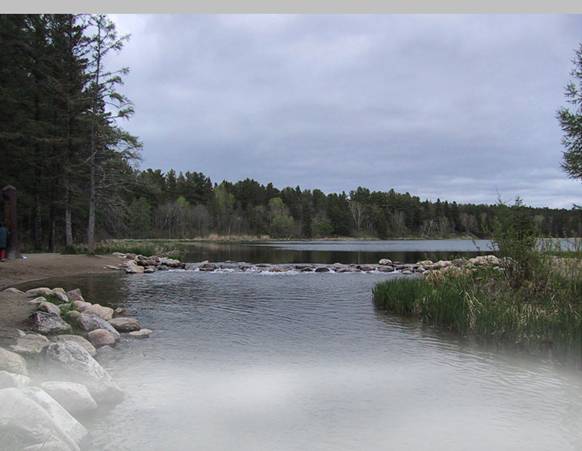
Step 16
Again, I will use the rubber tool to get rid of any hard edges.
Final results

No comments:
Post a Comment